
Simon Rigg
Editor's note: This post was originally published in January 2018 and has been revamped and updated for accuracy and comprehensiveness. The latest update was in September 2020.
Welcome back! This is the third part of a mini series which uses a fictional product, “ShipFast”, to walk you through the process of defending against various exploits in a mobile application to gain access to data on a remote server allowing real users of the system to gain an unfair business advantage at the expense of the company.
In this post I'll dive into the second attack scenario and look at how we can defend against it.
Full source code for the demo is available on github so that you can gain an understanding of the exploits and defences I’ll be demonstrating.
Enjoy! :-)
If we use a MitM proxy technique to view network activity between the app and the server, we can observer that a new "HMAC" header is introduced:
 In this case, the name of the request header is a bit of a giveaway, however, deeper analysis of the mobile app would also lead us to discover that API requests are now signed with an HMAC. Once that is discovered, we know there are three things to find in order to break this protection:
1 The HMAC algorithm
2 The HMAC secret
3 The HMAC message
Since we know the app must be computing this HMAC request header, we can attempt to decompile it using freely-available reverse engineering tools and perform static analysis. We know the result is added to an "SF-HMAC" header. We know an HMAC is used. We can hypothesise that the app must contain an embedded secret for the HMAC and probably uses whatever HMAC function comes as part of the standard libraries. We will now test our hypothesis.
We will decompile the app's APK using the Mobile Security Framework(MobSF), that under the hood uses other open source tools, like the Apktool. I will not cover the details here, but a good tutorial can be found on the article about How to Extract an Api Key from a Mobile App by Static Binary Analysis.
Looking through the decompiled code, we find something interesting:

Eureka! My bath is overflowing, brb... false alarm. Well, we have found quite a nugget here! This method, first of all, has been obfuscated. So +1 for the developer for at least doing that. In our case this used ProGuard but other solutions are available.
However, it is very important to note that you typically cannot obfuscate public methods as it is not certain at compile time what will be invoking them, so it is not safe to obfuscate them as it could lead to a nasty runtime exception. This is especially true for standard libraries, for example, javax.crypto which provides HMAC support.
What we see in our decompiled code snippet is:
1 The HMAC algorithm (the "HmacSHA256" string)
2 The HMAC secret (the long base 64 string "4ymoo..." etc)
3 The HMAC message. This is harder to find, but we can follow through the decompiled Java code or even the byte code pretty easily and look for calls to "Mac.update()" as those calls make up the HMAC message. We know when things are finished, because the "Mac.doFinal()" method will be called which produces the result.
HINT: It is easy to find standard library cryptographic functions in obfuscated and signed mobile apps.
In this stage of the demo, the secret is in code which is much better than in a static text file, but is still easily retrievable. Armed with our new knowledge, we can update ShipRaider to compute the new HMAC header and therefore continue to authenticate our rogue API requests.
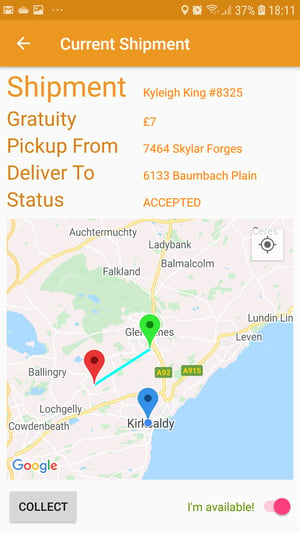
So now it’s time for you to switch to using ShipRaider for the static HMAC demo stage, and you must have noticed that it has now an orange colour scheme so that you can easily distinguish it from the one used in the previous stage. You need to login again with the same user you have logged in the ShipFast app for the same stage, and then you are now good to click again in Find my location button followed by another click in the Search for Shipments! button to grab those bonus shipments:

You can now repeat the same steps you have followed in the previous blog post and you will see the shipment you have selected showing in the mobile app:

It turns out that our previous approach is a really good starting point: signing the API requests in the app proving both who and what is making those requests which can then be verified by the server. This binds the requests to the user and the running app.
The problem is our implementation. To begin with, we use a static secret in code in the form of a single string. You may think this is obvious now that I mention it, but you would be surprised, even shocked, to discover the number of cloud-based services which offer access through an API or SDK which involves initialization using an API key, an API secret and often a base URL in code. This makes it easy to adopt the service, but unfortunately also makes it easy to exploit the service. Do you remember from the previous article how Google recommends you to add the Google maps API key?
We can obfuscate the HMAC secret by computing it at runtime which means regular static analysis will not yield the secret: the app must be run to generate the secret and store it in memory for use in the HMAC computation. The approach we use is kept simple for demonstration purposes, and the process is as follows:
1 Take our original HMAC secret embedded in the app code
2 Take the user's ID Token JWT fetched at runtime by the user logging in using Auth0
3 Perform an XOR operation on the two
4 Use the result as our new computed HMAC secret
In our Android app, the code to compute the HMAC looks like this:
// Obfuscate the static secret to produce a dynamic secret to initialise the key
// spec for this demo stage
val obfuscatedSecretData = Base64.decode(secret, Base64.DEFAULT)
val shipFastAPIKeyData = loadShipFastAPIKey().toByteArray(Charsets.UTF_8)

for (i in 0 until minOf(obfuscatedSecretData.size, shipFastAPIKeyData.size)) {
    obfuscatedSecretData[i] = (obfuscatedSecretData[i].toInt() xor shipFastAPIKeyData[i].toInt()).toByte()
}

val obfuscatedSecret = Base64.encode(obfuscatedSecretData, Base64.DEFAULT)
keySpec = SecretKeySpec(Base64.decode(obfuscatedSecret, Base64.DEFAULT), "HmacSHA256")
And on the ShipFast server side, the code looks like this:
// Obfuscate the static secret to produce a dynamic secret to use during HMAC
// verification for this demo stage
let obfuscatedSecretData = base64_decoded_hmac_secret
let shipFastAPIKeyData = new Buffer(config.SHIPFAST_API_KEY)

for (let i = 0; i < Math.min(obfuscatedSecretData.length, shipFastAPIKeyData.length); i++) {
    obfuscatedSecretData[i] ^= shipFastAPIKeyData[i]
}

let obfuscatedSecret = new Buffer(obfuscatedSecretData).toString('base64')
hmac = crypto.createHmac('sha256', Buffer.from(obfuscatedSecret, 'base64'))
It is almost like some strange game of spot the difference, but as you can hopefully see, the app and server perform the same HMAC calculation using the same secret key and message, and the server ensures both components end up with the same answer before authenticating the API request.
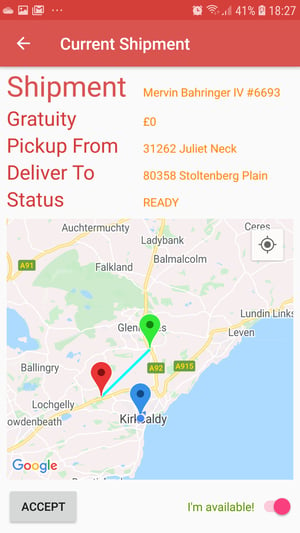
For the dynamic HMAC demo stage, you need to install this APK on your mobile device (no need to uninstall the previous one). Now launch the ShipFast app to see the initial screen with the dynamic HMAC colour scheme (red), and the mobile app should work as it did before:
Now go back to the ShipRaider web interface for the static HMAC demo stage and update the API version on the ShipFast API url to v3, the same one now used by the ShipFast app, and you will see that ShipRaider no longer appears to work.

So it looks that once again we have blocked those pesky ShipRaiders!
We need to get smarter now! In my next and final post in this series I will demonstrate a runtime attack on this second defence... but can we effectively defend against this?
Time to hack some kernels...
Thank you for reading and stay tuned!
