
In a previous article, we saw how to use code obfuscation to make it more difficult for an attacker to extract a secret through static binary analysis of the ChatGPT demo mobile app. However, it's important to note that code obfuscation is not always as effective in protecting secrets as we might hope. It can give a false sense of security, similar to the Maginot Line that the French built during World War II to deter the German invasion of France. As many know, the German military simply went around the Maginot Line and quickly invaded France, rendering it useless. This event is now often used as an analogy for situations where something provides a false sense of security rather than actual security.
In this article, instead of using reverse engineering to extract the secret, we will employ a Man-in-the-Middle (MitM) attack to extract it at runtime. This approach effectively bypasses the code obfuscation defence, which can give mobile app developers a false sense of security, similar to the Maginot Line. It's important to recognize that relying solely on code obfuscation may not provide adequate protection for secrets against determined attackers. The analogy of going around the Maginot Line, just as the German military did, highlights the limitations of relying on such measures.
So, let's learn how to use an Android Emulator with a writable file system. This emulator will enable us to install the MitM proxy certificate directly into the system's trusted store, without the requirement of rooting the emulator or making changes to the mobile app. This approach will allow us to successfully carry out the MitM attack and extract the ChatGPT API key from the mobile app discussed in the previous article.
What’s Different From Using Static Binary Analysis?
In a nutshell, using static analysis to find and extract secrets in an obfuscated mobile app can be a tedious and laborious task compared to performing a MitM attack.
Static analysis involves decoding the mobile app APK, typically into Smali code, and then searching for high entropy strings. However, once class names, function names, and variable names are obfuscated, we can no longer rely on them for identification. Merely finding high entropy strings is insufficient because they alone do not reveal the specific secrets they represent, such as a ChatGPT API key. Unless the secret has a distinguishable prefix, like some payment and cloud providers use (which is not advisable) where an attacker can easily search the code for strings matching the prefix to discover those secrets.
The approach described in this article utilizes an emulator to start the Android operating system in writable mode. This allows us to inject the mitmproxy custom certificate directly into the system's trusted store. By doing so, it eliminates the need to add the certificate to the user trusted store and avoids the requirement of repackaging the mobile app to establish trust in user-provided certificates, as mandated since Android API 24.
The advantage of the approach presented in this article is that it employs the same method to establish trust for the custom certificate across different Android API versions, as long as it is possible to launch the emulator with a writable file system. This ensures consistency in making the custom certificate trusted by the system, regardless of the Android API version being used.
Furthermore, employing an emulator with a writable file system provides significant power to the attacker, enabling them to bypass the security measures implemented within the mobile app. This capability extends beyond injecting custom certificates; the approach can also be utilized to install and execute additional tools. For instance, an attacker can install an instrumentation framework to intercept and modify the app's behavior during runtime. This grants them the ability to manipulate the code's functionality as desired. For example, to bypass certificate pinning, which is often used to mitigate MitM attacks.
MitM Attack Context
An attacker employs a MitM attack to intercept the communication between your mobile app and your API server. The objective is to gather sufficient information to automate subsequent attacks, which may involve stealing API keys or manipulating and redirecting data in real-time.
An attacker could be a legitimate user who seeks to bypass the limitations imposed by the mobile app's user interface and access services that are only available through the API. One potential scenario is where a legitimate user of a mobile app may want to gamify or access features/resources that are not accessible under their current subscription plan. In some cases, users may also aim to collect and use more reward points or discount vouchers than they are authorized to.
Is Doing a MitM Attack for Everyone?
Numerous open-source tools are available to assist us in accomplishing what may initially appear to be an advanced task, typically associated with hackers, pentesters, and security researchers.
The encouraging news is that you don't have to be an expert in those fields to conduct a MitM attack. All you need is a level of comfort using computers and a modest level of technical proficiency to follow a step-by-step tutorial.
What are the Limitations of this MitM Attack Approach?
The approach we are about to discuss is effective only for mobile apps that do not employ certificate pinning and/or runtime self-protection mechanisms.
To bypass certificate pinning in a mobile app, you can refer to this article that introduces an instrumentation framework to intercept the code at runtime, allowing the certificate pinning check to always succeed.
Required Setup to Follow this How To
This tutorial will provide a step-by-step guide, assuming that you will be following it on a Linux-based computer with Android Studio already installed and configured. The instructions provided in this tutorial were specifically performed on an Ubuntu 20.04 desktop computer. If you are using a different platform, you can either try using an Ubuntu 20.04 virtual machine to follow along or adapt the steps to your current platform. Although other Linux distributions are likely to work smoothly with this tutorial, they have not been tested.
Required Tools
Some tools are require to follow along this How To:
- Android Studio - Not used directly, but some of its installed tools will be required.
- Android Emulator - To run the app with a writable AVD, where we will install the mitmproxy certificate and the Frida server. It can be found in the Android Studio installation.
- Mitmproxy - The MitM proxy server to intercept the http requests from the Android emulator.
To prepare your system to follow along this tutorial you need to follow this Github gist for the following steps:
- MitmProxy Setup
- Android 29 Emulator Setup
- Adding the mitmproxy Certificate to the Android Emulator
How to use mitmproxy for the MitM Attack
Now that we have completed the setup of all additional requirements, we can proceed to the exciting part, which involves extracting the ChatGPT API key that the developer believes is well hidden through Code Obfuscation.
The Action Plan Summary
First, we will utilise the ChatGPT app in the emulator as a regular user, without attempting any form of attack. The objective is simply to demonstrate the normal functionality of the mobile app.
Next, we will run the ChatGPT mobile app in the emulator that has been modified to incorporate the mitmproxy certificate into its system trusted store. By doing so, we can easily intercept the requests to the ChatGPT OpenAI API backend by proxying them through the mitmproxy. This will illustrate how straightforward it is to monitor and manipulate the app's communication.
Start the Emulator AVD
To begin, please disconnect any mobile devices connected to your computer.
Next, ensure that any active emulators are closed, and then start the emulator again in the background by executing the following command:
emulator -avd pixel-android-api-29 &> /dev/null &
NOTE: the bit `&> /dev/null` will discard all output, including errors, and `&` will run the command in the background so that we get the shell back. If the emulator doesn’t start or otherwise misbehaves, try to remove `&> /dev/null` to see the errors being reported.
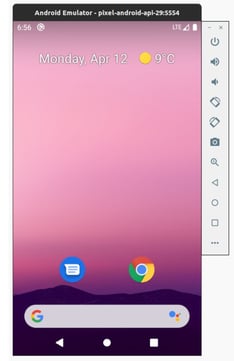
Wait for the emulator to finish booting, and once the process is complete, you will see the following screen:
Now follow to the next section to install the ChatGPT mobile app.
ChatGPT Mobile App Code
We will use the ChatGPT mobile app example, that you need to git clone to your computer to follow along:
git clone https://github.com/approov/demo-android-chatgpt
ChatGPT API Key
Before we build a release, you may want to use your ChatGPT API key to ask whatever you want from ChatGPT. However, if you don't have one, you can still use the mobile app to complete this MitM attack exercise, as all API requests will be made to the Postman Echo API.
To add your ChatGPT key open the MainActivity class and replace YOUR_CHATGPT_API_KEY with your own ChatGPT API key:
companion object {
    private const val apiKey = "Bearer YOUR_CHATGPT_API_KEY"
    private const val apiUrl = "https://api.openai.com/v1/chat/completions"
    private const val apiUrlTest = "https://postman-echo.com/post"
}
In this case YOUR_CHATGPT_API_KEY is being hard-coded directly into the mobile app code, which is a bad security practice. A best security practice would be for it to come from the local.properties file, but doesn’t make any difference for the purposes of hiding the API key with code obfuscation in the release binary.
Assembling a Release
First, create a key store or add the path to your current one to local.properties.
To create a throwaway keystore:
./bin/create-keystore.sh
The output:
Enter keystore password:

Re-enter new password:

What is your first and last name?

  [Unknown]:

What is the name of your organizational unit?

  [Unknown]:

What is the name of your organization?

  [Unknown]:

What is the name of your City or Locality?

  [Unknown]:

What is the name of your State or Province?

  [Unknown]:

What is the two-letter country code for this unit?

  [Unknown]:

Is CN=Unknown, OU=Unknown, O=Unknown, L=Unknown, ST=Unknown, C=Unknown correct?

  [no]:  yes


Generating 2,048 bit RSA key pair and self-signed certificate (SHA256withRSA) with a validity of 10,000 days

    for: CN=Unknown, OU=Unknown, O=Unknown, L=Unknown, ST=Unknown, C=Unknown

[Storing .local/approov.keystore.jks]


---> Adding, if not already present, properties to your /home/<user-name>/Dev/Approov/Blog/ChatGPT/local.properties file

---> Edit your /home/<user-name>/Dev/Approov/Blog/ChatGPT/local.properties file and add the password you have used when you first created the keystore.
When finished, and as instructed in the output, open the local.properties file and add the password you gave to the keystore.
Now, build a release:
bash ./gradlew assembleRelease
Install and Launch the ChatGPT Mobile App on the Emulator
Next, install it on the emulator:
adb install app-release.apk
Then, launch the app via adb with:
adb shell am start -n io.approov.chatgpt/io.approov.chatgpt.MainActivity
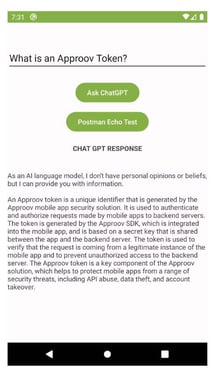
Once the the mobile app is launched you should see this screen:
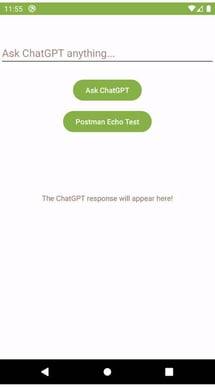
Now, type a prompt, click the Ask ChatGPT button, and see the answer. It should work as expected. However, if you don't have the API key for it, you should click instead on the Postman Echo Test button. This will show you the JSON payload of the API request that was sent to the Postman Echo API. It is exactly the same as what would have been sent to the OpenAI ChatGPT API if you had clicked on the Ask ChatGPT button.
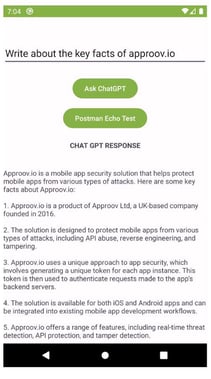
Example screenshots for when we click on the Ask ChatGPT or Postman Echo Test button:
 or
or 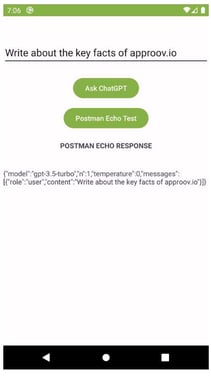
As we can see, ChatGPT was able to process the request and the Postman Echo API returned the payload that would have been sent to the OpenAI ChatGPT API.
Next, we will conduct a MitM attack to inspect the HTTP traffic between the mobile app and the ChatGPT OpenAI API backend.
The MitM Attack in Action
If you have followed the setup instructions for mitmproxy, you should already have a terminal open with the mitmproxy CLI running, but this instance was started with the –view-filter option, therefore we need to terminate it and start a new one.
From your terminal execute this command:
sudo docker run --rm -it -v ~/.mitmproxy:/home/mitmproxy/.mitmproxy -p YOUR_WIFI_IP_ADDRESS:8080:8080 mitmproxy/mitmproxy:6.0.2 mitmproxy --showhost
You should then see this:
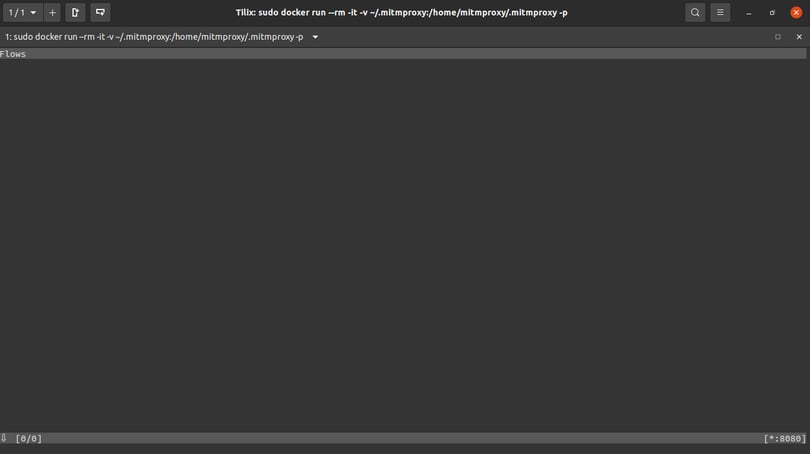
The mitmproxy should be listening on port 8080 of your WiFi network IP Address.
Start the Emulator with a Writable File System and with the Proxy Enabled
Close the currently running emulator and start it again, this time in writable mode and with a proxy set to your Wi-Fi IP address on port 8080:
emulator -avd pixel-android-api-29 -writable-system -http-proxy http://YOUR_WIFI_IP_ADDRESS:8080
You should then see this screen:
After the device has completed its reboot:
adb root
Remount the filesystem as writable:
adb remount
The output should look like:
#... some omitted output

remount succeeded
Launch the ChatGPT Mobile App
Launch the mobile app via adb with:
adb shell am start -n io.approov.chatgpt/io.approov.chatgpt.MainActivity
You should see this screen:
Now, write a prompt, send it and you should be presented with a ChatGPT or Postman Echo answer:
 or
or 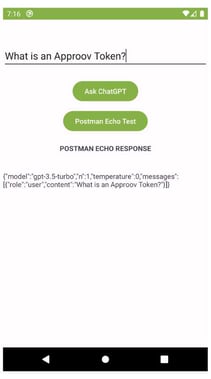
Attention: The ChatGPT answer isn’t accurate when it says the token is generated by the Approov SDK with a secret embedded in the mobile app. The Approov token is generated in the Approov cloud with a secret not known by the mobile app, but shared with the API backend. Learn more at approov.io.
However, if you look at the mitmproxy CLI you can see that the request being made to the ChatGPT OpenAI API or Postman Echo API is now visible at the end of the list:
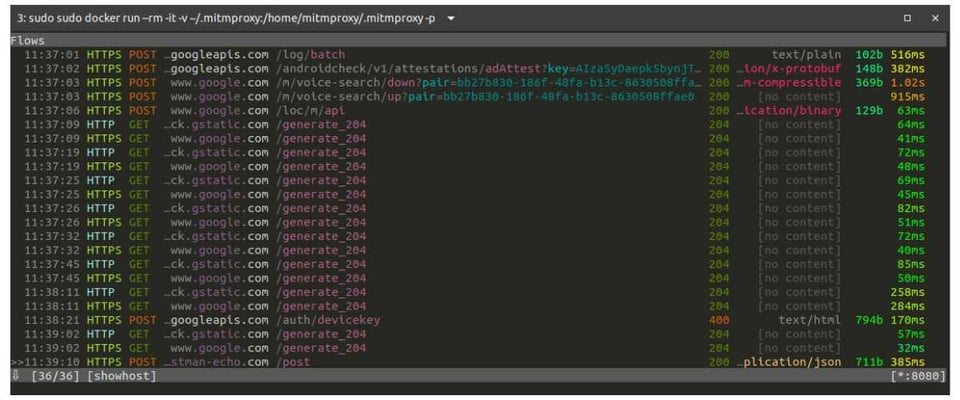
Let’s select the request to see its details:
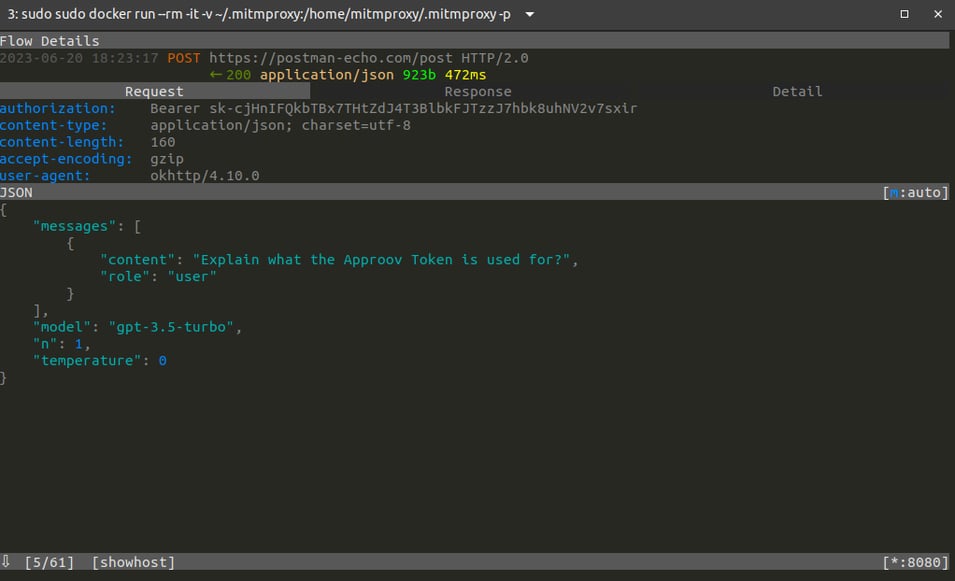
Attention: Yes, it’s a genuine ChatGPT API Key that is already deleted by the time I write these words, but go ahead and try it out.
By examining the headers section of the request, we can observe that the Authorization header, which holds the ChatGPT API Key, is visible. Therefore, the API key can be easily extracted for reuse outside the mobile app. The lesson to learn is that no matter how well you hide your API key in the mobile app, at some point, you need to send it deobfuscated/decrypted in the header of the API request, making it vulnerable to runtime attacks.
This means that automated scripts can now mimic the mobile app's traffic. From the perspective of the ChatGPT OpenAI API backend, these scripted requests will appear indistinguishable from legitimate ones.
Be curious, as attackers are often curious too. Also, take a look into the response tab. The information present in the requests and response tabs holds significant value for an attacker attempting to automate attacks against the API backend. It provides a comprehensive understanding of the life cycle of each request. For instance, this approach enables an attacker to utilise the extracted API key for the ChatGPT API and construct a bot to make queries and gather answers. The owner of the API key would unknowingly bear the cost of these requests made by the attacker's bot to the OpenAI ChatGPT API. Do you want to be the one paying the bill for the API requests made by the attacker?
After all the effort that developers put into using code obfuscation, with or without string obfuscation/encryption, to protect secrets shipped in their mobile app, the attacker easily bypasses such defences by using a MitM attack to retrieve the API key required for impersonating the mobile app when making requests to the API backend. Do you understand now how to look for a Maginot Line in your mobile app and API security posture?
Curiosity: Remember that in the previous article, I mentioned that some providers use a prefix for their secrets. I asked you to figure out to which company the "sk-" prefix belongs. If you couldn't find the answer back then, now you have it right in front of you. This highlights the fact that using a prefix in a secret is a poor decision, as it makes them easier to discover through static binary analysis rather than relying on a MitM attack.
What are the Better Alternatives to Code Obfuscation for Secrets Protection?
If the primary objective of code obfuscation is to hide secrets within the mobile app release binary, developers must consider an alternative solution, unless they are willing to accept the risk of their secrets being shipped in plain text format within the mobile app APK. Code obfuscation still leaves the secrets vulnerable to discovery and extraction via static binary analysis. Additionally, the secrets can be stolen at runtime through a Man-in-the-Middle (MitM) attack or by use of an instrumentation framework.
In order to mitigate the risks associated with using code obfuscation to hide secrets, mobile app developers and businesses should consider alternative methods for securely delivering their secrets. One such method is to have the secrets delivered just-in-time from a backend when they are needed for an API request. For instance, instead of embedding the ChatGPT API key in the mobile app code, developers could use the Approov Just-in-Time Runtime Secrets feature, which securely delivers the secret only to mobile apps that pass a remote mobile app attestation process. This remote attestation verifies the integrity of the mobile app and device before the secret is delivered, providing an effective and very strong layer of security against runtime attacks, while completely eliminating the risk of the secret being stolen in a static binary analysis.
Summary
Conducting a MitM attack is not overly complicated, yet it grants an attacker a thorough understanding of how a mobile app interacts with its API. With this knowledge in hand, the attacker can then automate attacks or develop additional services utilising the supposedly well-protected API key. This highlights the discrepancy between the mobile developer's perspective, who may believe the code obfuscation adequately safeguards the API key, and the reality of the attacker's ability to extract and exploit it.
Another important point to consider is that the API backend cannot rely solely on the assumption that every API request originates from the expected source, namely a legitimate and unaltered version of the mobile app downloaded from the official Android and iOS stores. This holds true even if the API request includes a valid API key and/or user authentication credential. Trusting the integrity of the request solely based on these factors would be inadequate.
In conclusion, it is crucial for mobile app developers to prioritise end-to-end security in their applications rather than relying solely on code obfuscation to protect their secrets. A more effective approach is for mobile app developers to implement Runtime Secrets, which involves removing the secrets entirely from the mobile app binaries. This ensures that code obfuscation focuses on safeguarding intellectual property within the code, a task for which it is better suited. By adopting such measures, mobile app developers can significantly enhance the security of their mobile applications by removing entirely one of the most critical attack vectors of a mobile app, the extraction and reuse of its secrets.
Cover Photo by Markus Spiske on Unsplash


